While you may decide to have your eucalyptus floor installed professionally, it is a job that can easily be accomplished by anyone with reasonable do-it-yourself skills. If you choose to install the floor yourself, it is important to familiarize yourself with each stage before starting the task, preferably before ordering the flooring planks.
There are many benefits of eucalyptus flooring: not only do they look at least as good as hardwood, but they are stronger and cost much less. To help you with the installation below is a simple guide on installing a eucalyptus floor in your home. The process is similar to installing a hardwood floor, so if you have previous experience doing that, your skills are easily transferable. But if you have never installed a floor before, don’t worry. Just read the instructions carefully before you begin.
A guide to installing Eucalyptus floors in your home
The process of installing eucalyptus flooring in your home is no more difficult than installing any other type of hardwood flooring. But to achieve excellent results that will make the best of your new floor and ensure that it lasts far into the foreseeable future, you will need a certain amount of care and patience. Don’t rush the job; make sure you understand every stage before you begin. There are three installation methods:
- Nail down
- Glue down
- Floating
The method you choose depends on several factors, including where you intend to install the floor, the kind of eucalyptus flooring you will use, and the furniture’s weight in the room. We recommend that you decide on the installation method before you order the eucalyptus.
Choosing your installation method
You will find a detailed installation guide below, but here, we will look at each of these three installation methods’ pros and cons.
1. Nail down eucalyptus floors
This common installation method involves nailing down your planks of eucalyptus to the subfloor, making it relatively easy for DIY novices. However, it does require the use of some specialized tools, so we advise doing a test-run with some sacrificial planks .
| Pros | Cons |
|
|
2. Glue down eucalyptus floors
This method involves gluing down your eucalyptus planks to the subfloor. It’s a relatively simple method, but it can get messy quickly unless you take precautions and practice on some sacrificial planks.
| Pros | Cons |
|
|
3. Floating eucalyptus floors
This is usually considered to be the easiest flooring installation method. All you need to do is slide or click the planks together, depending on the type of plank you chose. For click lock eucalyptus floorboards, you push the boards together until you hear them click. For tongue and groove eucalyptus floors, all you need do is add a little glue to the groove of one plank, then slide the tongue of the next plank into the groove. Finally, secure the boards with the special tape while it dries.
| Pros | Cons |
|
|
Now that you have chosen your method, we will move on to the project’s nuts and bolts.
Preparing to install eucalyptus floors
As with every big task, you need to do some prep work before you can start. Proper preparation is crucial, so don’t try to cut any corners. Don’t worry, though; this guide should make it relatively painless.
1. Order the eucalyptus
You can choose strand woven, solid, or tongue, and groove eucalyptus flooring. But if you intend to install your floor using the first two methods for a floating floor (gluing or nailing), you will need to choose either tongue and groove eucalyptus or engineered eucalyptus. Make sure you order the correct type. To ensure you have enough eucalyptus flooring, you’ll need to measure the room’s floor area accurately and add 7-10% to this figure to allow for cutting and waste. Don’t worry about having planks left over. They can replace planks that might get damaged in the future or for testing cleaning products.
2. Read the manufacturer’s guide
 When the boxes arrive, make sure that the shipment includes an installation guide. Once you locate it, please read it carefully before doing anything else. Among all the additional valuable information in the guide, it will also detail the installation method or methods the manufacturer recommends and the situations in which the manufacturer doesn’t recommend installation. For example, a manufacturer may recommend using engineered eucalyptus flooring in basements, but not solid or strand woven. Not adhering to these guidelines may void the warranty, which could be expensive for you if something goes wrong. For example, if you have ordered the wrong kind of eucalyptus, you should contact your supplier without delay. If everything seems to be in order, then you are ready to begin the installation.
3. Check the eucalyptus
The first step is to open up all of the eucalyptus planks’ boxes and inspect the planks for damage. While the eucalyptus flooring manufacturer should have taken every effort to protect the planks during shipping, mistakes do happen. If you find any damaged planks, don’t use them. Instead, look up the manufacturer’s return policy and make sure to follow the instructions to get a replacement or your money back.
4. Set your climate control
Before installing your eucalyptus flooring, you should ensure that you maintain the room at constant temperature and humidity for at least a week. Most manufacturers recommend a temperature of 60-80° F and a 40-60% (allowing for the local conditions). Please double check your installation guide.
5. Prep your subfloor
Before you can install your eucalyptus floors, you need to make sure your subfloor is level, structurally sound, and dry. This means getting out the level, checking for loose floorboards or deep cracks, and doing a moisture test.
6. Address any subfloor problems
If your subfloor isn’t level, it’s often relatively easy to fix this by sanding/grinding down high areas and to fill in low areas using the appropriate filler. If your subfloor isn’t dry, you can fix this by using a dehumidifier (rent one from a Big Box store) or installing a 3-in-1 underlayment/moisture barrier. However, if your subfloor isn’t structurally sound, then you may have some more significant problems. Sometimes you can solve this by screwing down any loose planks, but you may need to replace the subfloor in some rare circumstances. Ask a trusted local contractor for their advice.
7. Prep your crawlspace
If you have a crawlspace, then you need to check it for moisture as well. If there’s too much moisture, use a dehumidifier and install some vents to fix the problem.
8. Acclimate the eucalyptus
You’re almost ready to start your installation, so you need to leave the eucalyptus planks in the cleared room to acclimate to the temperature and humidity. Most manufacturers recommend leaving the planks for 72 hours, but it’s still a good idea to check your installation guide. Don’t leave the planks to acclimate directly on top of the subfloor. Lay down a plastic tarp to create a barrier, and make sure it extends at least 18 inches out from the flooring boxes/pallets.
9. Gather your tools
 Important: Save money by renting the bigger tools from a Big Box store or borrowing them from someone you know.
Tools needed
- Tape Measure
- Chalk line
- Rubber mallet
- Tapping block made of wood/hard rubber
- Carpenter’s square
- Expansion spacers
- 3-in-1 closed underlayment
- Oscillating, Mitre, and Table Saws
- 40 tooth (min) carbide saw blade
- 23 gauge micro pin nailer or moisture-resistant adhesive (to install moldings)
- Tape that will not damage the finish on the bamboo planks – check your manufacturer’s guide
Additional tools and materials needed Depending on the installation method you will be using, some additional tools are required. Nail down
- A high powered 18-gauge pneumatic floor nailer
- 18-gauge cleats, with a length that correlates with the thickness of your subfloor
- Asphalt-saturated felt paper or red rosin paper (check your manufacturer’s recommendations}
Glue down
- Specialized glue remover wipes
- Adhesive with a moisture barrier
- Compatible trowel
Floating
- Tongue and groove glue (if using tongue and groove boards)
Installing eucalyptus floors
So far, that covers the basics. You now know how to undertake all aspects of the preparation work, and you are ready to move on to the actual installation. Here, we summarize the basic steps of each installation method. For detailed information on each of these, please follow the appropriate links.
All installation methods
Whichever installation method you are using, some tasks apply to all of the methods. We will deal with these first.
Underlayment – Most eucalyptus floors should be laid over an underlayment – if nailing down, you’ll want to use 15 lb felt paper. If installing a floating floor, you’ll want a 3-in-1 underlayment to protect them from moisture and reduce noise. Please note that some underlayments are installed differently than others (e.g., some are installed with the plastic moisture barrier film facing down, while others are installed with the film facing up). Make sure you read the installation instructions carefully.
Work out of multiple boxes – As a general guideline, note that the color and shade of eucalyptus planks often vary between boxes, so we recommend you work out of 4-6 boxes simultaneously. This way, you will avoid any patchwork appearance.
Expansion gap – Like other hardwoods, eucalyptus expands and contracts with varying temperatures and humidities, so it is important to leave an expansion gap between ¼ – ½ of an inch between the walls and the planks. Use expansion spacers to maintain this gap, and after laying the floor, remove these spacers, and cover the gap using moldings glued to the walls.
Select your starting point – While you can start to lay your floor from a side or a corner, the standard practice is to start at the center of the room and build outwards. Measure the room, mark the center, and lay the first row of boards along this line.
Nail down eucalyptus floors
As we have said, nailing down a Eucalyptus floor is easy. Here is a step-by-step guide:
- Carefully place the first row, following the instructions given above on centering it, and face nail it to the subfloor. With tongue and groove flooring, the rest of the planks can be blind nailed. Nails should be spaced at 8 to 12 inches.
- Attach the next row, and nail down through the tongue at an angle of approximately 45 degrees from the face, again with nails placed every 8 to 12 inches.
- Attach subsequent rows, and nail down similarly.
- Each time, check that you have set the nails correctly so that there are no visible cleats on the planks’ surface. Ensure the cleat heads are embedded sufficiently so you don’t get goosebumps upon sliding in the next plank.
- Continue until you have covered the floor.
- Scrutinize your work, and when you are satisfied, you should remove the expansion spacers and install moldings to cover the expansion gap. Then glue them in place.
- Finally, thoroughly clean the floor, removing all debris. Now, sit back and admire your handiwork.
Below is a detailed guide on how to glue down eucalyptus floors.
Glue down eucalyptus floors
Ensure you are using the correct glue – always use a 100% urethane flooring adhesive; do not use a water-or-latex-based adhesive. Follow the manufacturer’s guidelines regarding safe storage, handling, and use. You should always wear gloves and avoid getting the adhesive on your skin. If you are gluing down to concrete or over a crawl space, an all-in-one adhesive with a vapor barrier must be used. Here is a step-by-step guide:
- Carefully mark the position of the first row of planks.
- Following the manufacturer’s instructions, spread adhesive. Use no more than you can work with during a 40 minute time period, which will be between 100 and 200 square feet.
- Lay the first row and put it in place using blind nailing through the tongue or wedging.
- Add more adhesive and lay the second row. If any adhesive gets on the face of the planks, remove it immediately with flooring adhesive remover wipes. Don’t let the glue dry on top of the planks, or it will damage the finish!
- Walk on the flooring within 30 minutes of laying to ensure it is firmly bonded.
- Finally, remove expansion spacers and cover the gap with moldings glued into place.
- Clean the floor thoroughly, making sure no traces of adhesive remain on the surface.
Here is a detailed guide on installing a floating eucalyptus floor. This is the easiest installation method, though there are some differences in how you attach the boards:
- For click-lock eucalyptus floorboards, you push the boards together until you hear them click.
- For tongue and groove eucalyptus floors, you add a little glue to the groove of one plank, then slide the tongue of the next plank into the groove. Finally, secure the boards with a little piece of the specialized tape until the glue dries.
Step-by-step instructions:
- Carefully mark the position of the first row. Ideally, you should install the boards parallel to the longest wall starting in a corner with the grooved side in contact with the expansion spacers.
- Click the second row of boards into place. With tongue and groove boards, apply a little glue for the next board’s groove before sliding into place. With click-lock boards, lift the second plank at an angle and press it down until it clicks into place.
- Make sure you offset the end joints of the rows by a minimum of 8 inches.
- Continue the process until you cover the entire area.
- With the final row, you may need to cut lengthwise to fit the space.
- Remove spacers and glue moldings over the expansion gap.
- Finally, clean the floor and enjoy that great feeling that goes with doing a great job.

Sit back, relax, and admire
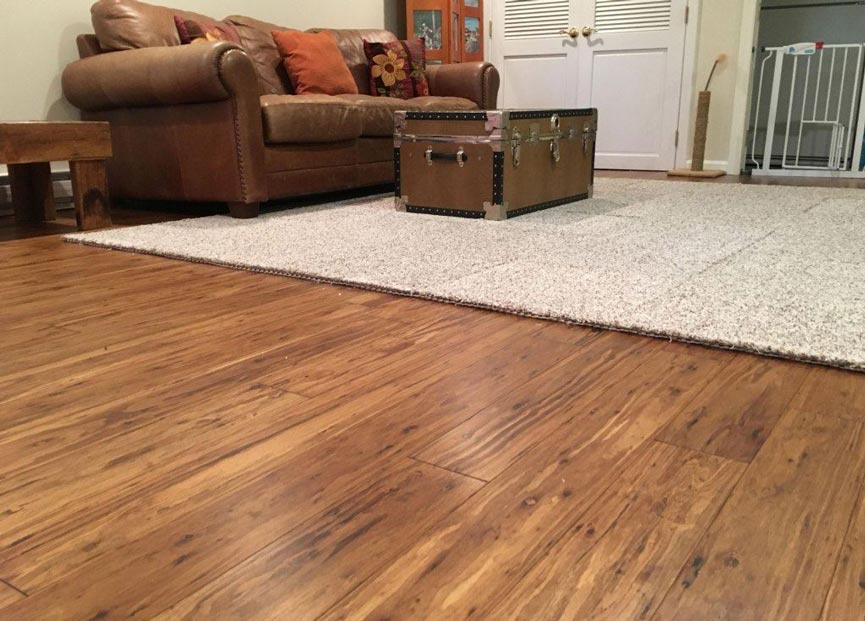
Now you can sit back, relax, and enjoy a nice, cool drink while you admire your brand new eucalyptus floor. Doesn’t it look great? Why not leave us a comment about it or even send us a picture to publish on our blog.
If you would like to have a sample of our beautiful and durable eucalyptus flooring sent to your home, click on the box below. Or you can call 866-710-7070 today and speak with one of our flooring professionals.